
I have several friends who, over the years, have gutted piano’s to use as a glorified keyboard stand on stage. I’ve loved the idea and always wanted to try it. My friends Matt Papa and Steven Patterson from BRANCH led the way.
I’m a piano guy, love the sound and feel of wood and steel, but there’s no way I could travel with a big heavy piano. Last week I found a guy on Craiglist trying to get rid of an old beat-up wurlitzer so I decided to give it a try.
After agreeing to buy the thing I discovered the first challenge, this piano wasn’t full-sized. 72 keys instead of the standard 88. My Yamaha stage piano is full-sized. This would be a problem. However, it also solved a problem. My rig has all the cable ports (audio outs, power, pedals, MIDI) on the side instead of the back. Even with a full-sized piano I knew it would be a challenge to figure out access to these ports. Would I have to drill through the side of the piano? Notch out the wood? This little baby-spinet piano solved that problem. I would have to notch the sides out with a jigsaw to get the piano in any way. So here we go.
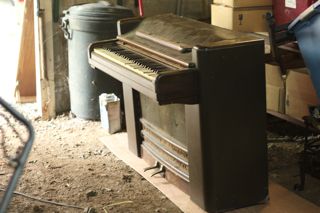
My drummer Jeremy helped me pick up the little guy and haul it back to my garage. The first step would be to just admire the unique lines of this 72 year old beauty. Instead of being entirely rich dark wood. The curved sides and top of this Wurlitzer are wrapped in leather.
The curved top was easy to remove. A few tiny screws and hinges. Don’t forget to be careful with these early pieces. It’s the exterior visible stuff that will probably go back on the piano later. Once the top was off the roll top was easy to remove. Then it simply became a process of removing what looked to be next. Hundreds of screws. I tried to keep screws with the wood accents that they held in place. Screws that held pieces that would obviously be removed went into a large recycle box.
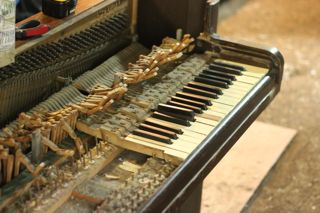
Next came the keys and the mysteries. I’m left to wonder what all is hiding beneath the keys of my studio piano. In the wurlitzer I found $0.39, an old fingernail file, a carnival ticket, and a dart body with no feathers. Plus enough dirt to build a sand castle. Pretty gross work. The keys came out easily. Wurlitzer did me the favor of stamping the keys with sequential numbers. I was able to put them back on the key bed once it was removed for some etsy fun (maybe this Fall).
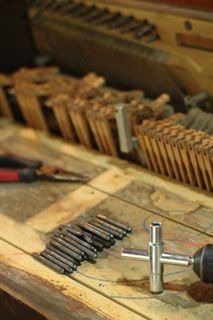
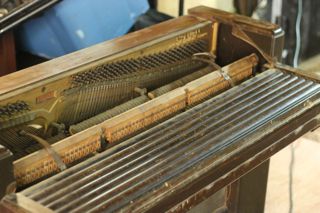
The most daunting task would be the steel strings. I found a post from another guy who had done this same project and I followed his advice. At the hardware store I found a key in the plumbing section made for turning sillcock faucets. With a little creativity I attached it to our drill and it became the ultimate tuning pin power-tool. This little piano had 172 steel tuning pins. It was difficult work for the drill and the battery would drain about once an octave.
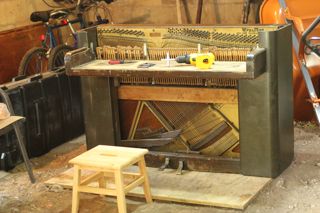
As the strings come out the job becomes clearer. “This piece goes.” “This piece stays.” For now I’ve decided to leave the steel frame and sound board in the body. Because this piano is so small I was worried the front-weight of my keyboard would cause it to tip. That steel frame will definitely make it more difficult at load in and load out but it just might help me avoid a piano crash mid-show. we’ll see. *ON THIS NOTE: a recommendation for others who want to try this: if you go searching for a piano to try this on, pay attention to the front legs. Spindly front legs are likely to break on the road. No front legs (like mine) will make the piano prone to tipping. Legs tied in to a base support as in the piano example from Milo Wilson (and in my studio at home) would be ideal.
Notching the wood with my jigsaw was my least favorite part. Cutting a clean line around the curved edge was stunningly difficult. I butchered it. Snapped one piece right off and had to put the gorilla glue to work. It will definitely make the side access easier for my cables but cutting into this beauty was heart-breaking.
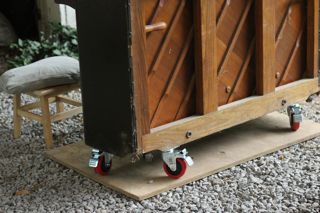
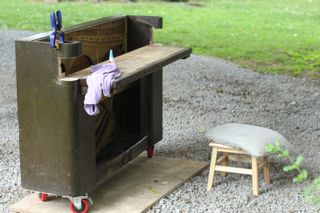
The heavy duty locking casters were the most expensive piece of this project. At $10 a piece, I think they are a worthy investment for all of the traveling this guy will do. They raise the height of the keyboard considerably but that actually makes standing to play easier. When I do sit it’s on a hydraulic drum throne that Geoff Clapp gave me years ago. At full extension it’s the perfect height.
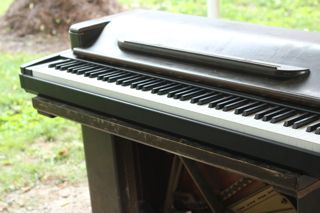
The final step was to put the keyboard in and reattach the top and other wood accents. For now, I have left of the lower front screen. It was a mess of fabric remnants and rust. I’ve kept it n case I decide to bring it back to life. I can’t wait to get this thing on stage. It’s just a stand but it cost me less than the simple x-brace I’ve been using for years.
See ya along the road!